The other day I was making an oven hot pot of garlic, onion, carrots, potatoes and chicken breast and failed to add adequate water or a tight enough cover for it to cook perfectly. When I got home later, the chicken was perfect (being buried under the veg) but the veggies were a little too brown and wrinkly for my taste, not to mention that of my five year old daughter. However, they still tasted good and the extra roasting had caramelized some of the sugars and they tasted nice so I was loathe to waste them. My resulting recipe ended up as a lovely warm and hearty winter puréed soup that I froze some of and am currently enjoying the rest of as I type.
You will need
2 cups chopped potatoes (I used 4 smallish red potatoes, skins left on)
1 medium onion, chopped
3-4 carrots, chopped
3 garlic cloves, chopped or minced
Juice of 1/2 a lemon
Lawry's or Johnny's or Old Bay seasoning salt
1 tsp paprika
3 tbsp Frank's Original Red Hot Sauce
OR
1 tsp cayenne pepper and 2 tbsp white vinegar and a little extra garlic
1 tbsp chopped ginger (optional but nice)
3 cups vegetable broth
1 can of great northern beans (or your choice in beans) drained.
Olive oil
For the first part, you need to roast the veggies. Take the onions, potatoes, garlic, ginger if you're using it, and carrots and put them in a baking dish. Sprinkle with your choice of seasoning salt and paprika. Baste with olive oil. Cover with aluminum foil. Put in the oven at 300 degrees Fahrenheit for approx 45 min to an hour, checking every 10 min after the 40 minute mark to see if they are done. You can overlook them to a browned (but still squishy feel, nothing burned to a crisp here) look, but mainly they just need to be soft.
Once they are soft, put all remaining ingredients and the veg into a blender and purée. Add more Frank's red hot and lemon for taste if you like. If it's too thick, add a little more broth. Consistency should be a little thinner than pudding.
Garnish with a sprig of basil, rosemary or chives and enjoy! Creme fraiche may also be swirled in if you prefer. Best with a lovely piece of toasted, sprouted grain bread and butter (or olive oil).
Makes approx 4 servings
Historical and costume gown diaries, sewing projects, costume research, jewelry and more!
Tuesday, 28 January 2014
Random Recipes-Winter Warmer Root Vegetable Soup
Friday, 19 October 2012
And now for something completely different....
XENA QUOTES!!!
Meg: "My father died in childbirth." "Your father died in childbirth?" "He got drunk and fell off the roof while I was being born."
Sunday, 18 September 2011
Sky Blue Venetian Gown
Ever since I first saw the portrait of 'La Bella Nani' several years ago, I have been wanting to make a Venetian style gown like the one in the painting. Up until now, I have not dared to try. So, here goes. Several hours of perusing other dress diaries of the same style, and lots of googling, here I am. A few weeks ago I was at the pub where I work and saw a package of fabric laying on a shelf. Upon closer inspection I found a pair of ivory cotton blend curtains with a simple scroll design on them. My boss said I could have them, since they'd been lying around for over a year and no one had claimed them, so naturally, I did! (Incidentally I also got a nice piece of red cotton velveteen from this same pub, it had been stuffed in a dusty hole under the benches next to the gas pipes along with scraps of newspapers from 40 years ago). A couple of boxes of Dylon Fabric Dye in China Blue and a rented washing machine later, I had this lovely shade of baby blue. The scroll pattern shows up a LOT more when it's this colour, and I'm still deciding if I like it or not, but it is pretty....just, maybe not too period (although I didn't think polka dots were period and then they found a polka dotted damask child's burial gown from the same time period). So given that, I'm going to ignore the pattern for now. I'm sewing the entire gown with white thread, so if I ever change my mind and decide to remove the colour, I'll be ok.. I am going to make this gown with a slightly less pointy front and
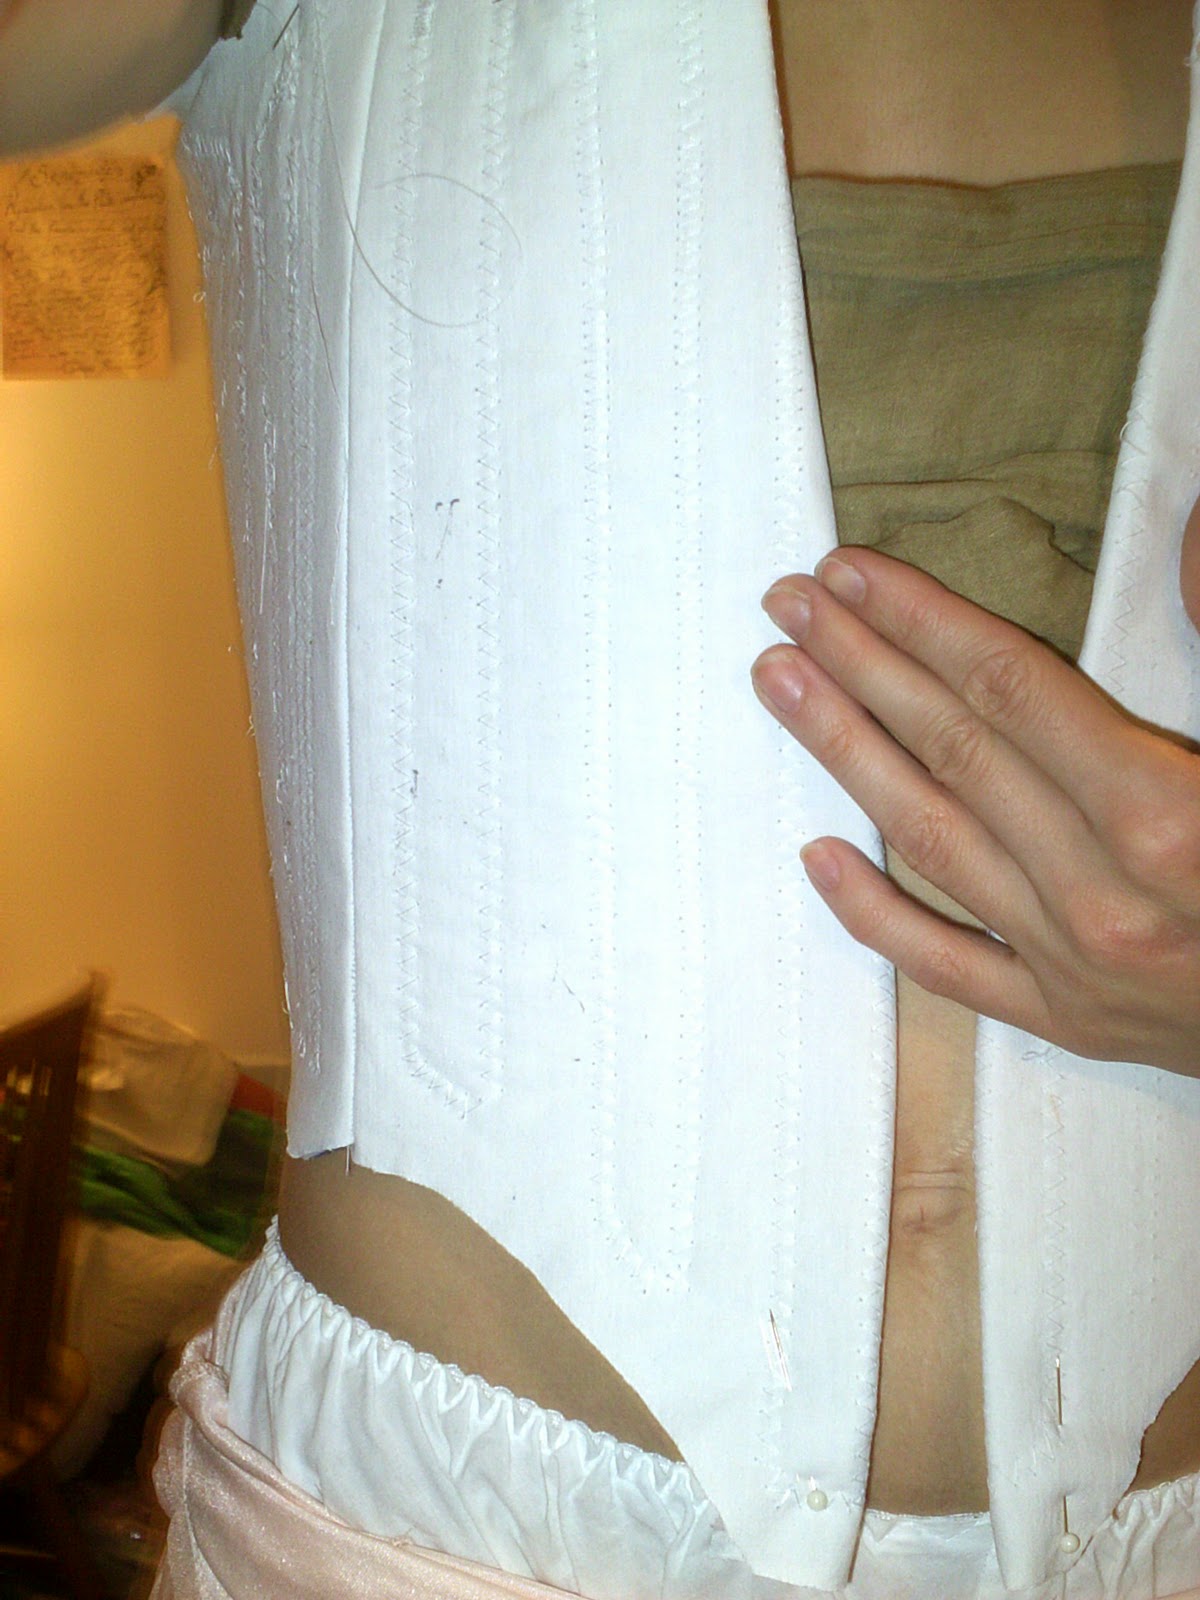
with a split skirt, using a white damask fabric as a completely separate petticoat. I'll only be using the damask for the front half, since I don't have enough for a full skirt. I found some lovely handmade looking lace with pointy bits that looks a lot like the laces I've seen in some other Venetian gowns, and that will be going around the neckline, cuffs, and possibly the shoulders as well, depending on what I'm going to do with the sleeves. I'm not going to have cutwork sleeves, as I don't want to go out and buy a matching velvet or another fabric for them, (the blue fabric frays like heck). I think I might have paned sleeves, fitting tightly, with slashes running down them like the Red Pisa Gown, but due to me having limited fabric (and wanting a full skirt) I may jazz it up with some thick white velvet ribbon on the edges of each blue panel, and to imitate slashes, join the ribbon/fabric panels together at regular intervals with pearls. For the gown I am going to try the doppia technique as shown here, and I am going to make a corded hem on the petticoat to make it stand out a bit. I hate hoopskirts. Mine always get bees and wasps stuck up them. I am terrified of wasps. For the corded hem, I'm thinking of buying some of the horrid, but semi thick orange rope they always use for construction projects. It's 100%plastic, so washing won't be a problem. It holds it's shape, and it's the right mix of firm/flexible to work..I think. We'll see. For the bodice I have used the corset pattern for Simplicity 2621 without the tabs, and modified a little. For starters, I made the opening at the front, and cut the back in one piece. I also made the shoulder straps wider, and longer. The picture below you can see that when I cut out the pieces, I made sure the blue polarfleece was cut about 1cm skinnier than the other layers for seam allowance, so I was only sewing the thin fabrics together.
</>
</>
![]() |
| Hor those who have said 'Venetian gowns had only closed skirts!' Here is my proof otherwise. Ha! AND it has paned sleeves.... |
Labels:
courtesan,
Italian,
Renaissance,
sewing,
Venetian
Wednesday, 24 August 2011
Gown Photoshoots!
I found this lovely photographer named Az, the genius behind LemonTree Photography (http://lemontree-photography.co.uk/). One cold spring morning earlier this year he and I wnet out to the hill behind the town I'm in and took these photos (and a lot more).
![]() |
| This photo made me want to put fur (faux) on one of my next gowns.... |
![]() |
| Italian Renaissance gown, Ophelia style |
![]() |
| The first proper gown I made, I made this during my 16th year, mostly on the school bus, and during classes, choir (while singing), maths, English, and occasional science classes :-) |
![]() |
| My 'Mary of Scots' gown, amazing what fabric does for the overall look of a gown |
Tuesday, 23 August 2011
Life, Divorce, Drama, School, and Work. Not to mention children.
Yep, I have been occupied offline with 'other things'. See title of post. I may or may not be going to school in the UK, and I will be moving in the next few months. Which means, all my sewing kit is in boxes, and my usual fall/winter flurry of dressmaking activity has been suspended. BUT, I do have some snapshots of finished gowns sent in from customers taken 'right out of the box'.
Wednesday, 2 February 2011
WHEE! Nearly there!
Di's gown is almost done! I have cartridge pleated the skirt, finished the bodice etc. All that remains to be done is to put the boning along the zipper in the bodice, hem it, put the hooks and eyes on the forepart and skirt, and add the trim, most of which will be done today. Muriel's gown has the lining done, boning put in, underskirt finished, all I have to do is piece together the outside of the gown, attach it to the lining, put on the zipper and trim, and voila! HOI's gown is cut out, minus the bodice as I still have to wait for her to get the mockup, and is one of the simplest so far due to really easy fabric to work with. At this rate the first two gowns should be shipped out by early next week, and the third by the middle of the month! Photos will come later, I am too busy to upload now!
Tuesday, 25 January 2011
Yargh, January is not my month.
I am going to simply re-do the slashed sleeves, with some beads on the ends, but with smaller slashes, and no ribbon trim for Di's gown. It will look a LOT better. For Muriel's gown, I am going to use the current polyester habotai skirt I have as a removeable (maybe) underskirt only. I have purchased 100% real silk habotai, and will be using that for her gown instead. One good thing though, for the third and final gown order I've had so far, I managed to make a mint green fabric, look like a lovely sage colour! It did take 2 baths of Dylon Olive green, but, SUCCESS!! It is a shade darker than her original colour sample, but VERY close to her final choice of fabric (which was sold out. I should be the only person allowed to sop at my local fabric store. such hassle of finding replacements!). I finally found a childminder, now I just need a little more time on my own, WHE I'm awake, and I'll be able to FINALLY finish them! Having a toddler who won't watch TV on her wn nstead wnting to ''help'' mama, is an adorable, but nearly impossible to work around distraction. Tonight, I crack down on the gowns. Coffeepot, here I come!
Tuesday, 18 January 2011
Spanish Style Slashed sleeves
As you probably may know from my earlier posts, Di wants to have Spanish style sleeves with her gown, with slashes, and a hanging oversleeve. I have never done this before. Annnd...the fabric we have for the undersleeve isn't exactly fray-proof...so..here goes...
| As the sleeves in the photo are made of 2 fabrics, I laid my 2 fabrics out like this under the pattern, leaving about 1/2 inch for seams, and pinning everything well in place. |
| I cut rectangles of my second type of silk (the silk haj) and gathered them at the ends and basted them in place all the way around the slash |
| I hand sewed the white trim, and then added tiny baby blue seed beads just for an aditional effect if anyone looks up close. |
![]() |
| The inspiration.... |
Friday, 14 January 2011
Third gown order!
Whee! So, I am just about done with Muriel's skirt (as in, I'm taking coffee break then it'll be done!), am cutting out Di's as well which will be together by tomorrow, both bodice mockups fit pretty well, adjustments noted and are on their way back, which means..THE FUN PART STARTS NOW!!! Oh I SO want a tailor's dummy....
Also, I have one new gown order in! She also wants the Queen Mary style gown (as I've taken to calling it) and she's chosen a lovely sage green fabric (middle), with a lining in a berry red satin (left), with berry red trim as well. GORGEOUS! Happy days, now, back to work!
Thursday, 13 January 2011
Just a note.......
I am NEVER working with synthetic silk/habutae again. EVER. Muriel's gown is going to be gorgeous, and the skirt will flow beautifully, but it took me THREE hours to piece together her skirt, measure and pin the hem, and sew 2 feet of it. And that's only the first seam. As I'm doing French seams, after I stitch the hem up, I have to go back and sew each of the panels again. Normally, not a problem. But with lightweight slippery fabric that wants to do it's own thing? It's a pain in the butt. And some of the seams aren't straight so I'll be going over those again. I am NOT looking forward to the bodice, but perhaps due to it being lined and stiffened with several layers of fabric, it will be easier than working with the habutae on it's own. Anyways, After I managed to piece together the skirt, trim the seams, measure and pin the hem (using Di's measurements accidentally), then measure it again (this time using the correct ones) then starch and iron it on the lowest possible setting, then pin some more, then trim said hem, then FINALLY begin to sew it, a tiny piece of thread got stuck in the bobbin of my machine and jammed it so I had to open it up, and used this as an excuse to take it apart, clean and oil it, put it back together, and then broke my needle. LOL. I have more needles. Somewhere. I have organized and can no longer find anything! Anyways, Muriel, if you're reading this, I blame me for offering false silk habutae as a fabric option. PLEASE don't ask for it agan if you order anything else from me? I'm begging you!! Other fabrics (aside from acetate satin and polyester organdi/organza) are sooo much easier to work with!) Linen perhaps? Cotton velvet? Duchess satin? Brocade? Wool? SO much more preferable haha. Anyways, I WILL win. End of story. Once I am finally done fighting with the skirt, and have won the battle (and oh I will dammit), have hemmed it and finished the seams, then I'll be making Di's skirt, which should go a little quicker due to the cotton vevet having a tendency NOT to slip everywhere.
| Acres and acres of skirt! And that's not all of it folks... |
Silk Haj partlet and other things
I bought some 100% silk haj to use with Di's gown in the sleeves and also to use to make an Italian Renaissance style partlet out of. I have never worked with silk haj before. I have never worked with any fabric that is thinner and about at flimsy feeling as toilet paper either. 2 hours of VERY careful hand-stitching later (I love it when the pub-my work- is empty, so much spare time!) and I have sewn up ONE side of the front and carefully stiched on clear faceted seed beads over the pale yellow/gold thread. I was going to have it beaded and embroidered, similar to the portrait on the left, but then decided to make it easier on myself and I bought a bronze large dress net to sew over the top to be a little more similar to Eleanora's portrait above. My plan was to fix it to the silk at each cross-section with a small bead. Except that the bronze doesn't really go with the yellow thread and clear seed beads. Now I'm thinking I'll stick to my original plan of embroidering it, and adding a collar with a thin lace trim and making it an Elizabethan style partlet instead or perhaps one with a short standing collar trimmed in lace like many of the Medici women's portraits. Except, I am going to not only use an embroidery hoop, but I will be tacking paper, with a pattern drawn on (in light pencil) or printed on to the back and sewing the design on with the paper to give the fabric more substance. I can then just dampen the fabric and peel the wet paper off later. This stuff is as light as spiderwebs, floaty and a pain in my bum. But SO soft, and so gorgeous! For embroidery patterns I found a book called Tudor Treasures to Embroider at the library and I will be printing out a few patterns from there.| 2 hours, for this?? Really? Ok I was working too, but still... not incredibly proud of this, but, once starched and embroidered, it can be redeemed.... |
| My other idea, to stitch on this net. I think I'll make 2 partlets...net on one and one netless |
Thursday, 6 January 2011
What a week.......
| The red stuff, the gold stuff, and the pink stuff. None of it is incredibly period. |
I am also making myself another gown for the faires this year, 3 actually, and boy oh boy am I going to have fun! An Italian Renaissance style gown in the style of Empress something or other from Portugal and Eleanora de Toledo, an Italian ''courtesan'' gown, most likely with cutout sleeve detail as in the photo on the left, and another Elizabethan gown, when find enough money to buy the jaqquard I want! I have a red damask to use but I'm not sure if I have enough, and an antique gold one with a checkered-weave to it and a more modern looking pattern, I think I may actually dye the fabric an emerald green so that it is a slightly shimmery silk damask look and the pattern will dissapear a bit. I have an emerald green 'silk' and pure gauzy white silk as well. I have also fallen in love with a robin's egg blue jaqquard with red, pink, green and gold floral motifs, which is kinda period. I might be stretching it a little, but it's GORGEOUS! I am going to be buying oodles more of the silk to dye it as well and make myself a fairy gown for Faerieworlds music festival this year as well. It is so light, gauzy and floaty, I'll line it with a sheer cotton muslin and dye the whole piece together...sooo excited! I never have actually done that before...
Tuesday, 28 December 2010
Pattern reworking on Simplicity 3782-Sizing up
To be 100% honest, I have never made a plus size gown before, the largest gown size I made was a size 12 and I didn't modify it one bit, I'm quite liking this challenge! Muriel is a size 20-22, and the pattern I have only goes up to a 20, which is in places, a few inches taller and a few inches thinner than she is. Obviously made for size 20 models who are closer to 6 feet tall, and not for a petite lady. So I have to do some clever reworking. I want things to be held in, supported, and fitted, and so I have gotten some spiral steel boning in addition to plastic boning I will be using for the bodice. I cut out a mockup of the bodice last night and added extra room for the bust and waist, and also modified the collar a bit so it will be a bit taller, and stand up more. I made a bit of a whoops though, and didn't cut it long enough to accomodate the extra width I added in the back, so I have cut another panel to add to the back of the neck. I am quite liking this challenge, larger size=more fabric which= more room to decorate! Buuut, she wants a fauirly simple gown so far, fitted sleeves with shoulder rolls, single skirt no problem, but not a lot of trim on the bodice. I'll add a touch more on the shoulder rolls :-) The light olive green tone should go beautifully with her olive/golden undertoned skin and dark hair too, I'm so excited! I am mailing out the bodice mockup tomorrow, and then I'll start work on the skirt, sometime tonight, or tomorrow. I am annoyed with the habutae silk as it is a synthetic and therefore tricky to work with. It flows and hangs beautifully but I need to iron it on a low setting. I'm torn as to whether I should starch it to make it stiffer, or sew it while it's all flowy, I may starch it on the skirt, along the pleats to help keep them in place...we shall see.....
I have made this one out of a stiff curtain lining fabric, and will stitch it together today and ship it out to Muriel tomorrow so she can see how it fits. Until then, I have Di's gown which I'll be cutting out the bodice mockup tonight and putting it together as well so I can hopefully ship both tomorrow. I'll then start work on the skirts for both of the gowns and Di's partlet.
| Finally! It's 3D! |
Monday, 27 December 2010
The Peacock Gown
The fabrics are below...
Gown for you, gown for me...
I'll be putting some photos up here soon, but for now this post is only going to be text! I went to the fabric shop again today to get more of the satin backed dupion (false silk dupion) in the peachy blush colour, and I decided, on a whim, screw it, I'm going to grab some for a gown for me! So I got some of the same in a copper colour, and in an emerald green colour, and will soon be making myself a STUNNING gown. After I finish everyone else's. I am going to go more ornate with the sleeves and be making a partlet so I grabbed some 100% silk paj, a very fine, soft floaty silk in cream that I'll be using for my gown, my partlet, and for Di's gown, to puff through the slashes in her sleeves. I have been asking my hubby for about a week now to bring the vacuum to the top floor, but he's away for the day now so I guess I'll have to get off my butt and do it. The top floor has bits of faux fur littering it from a velvet pirate frock coat I'm working on, or was working on, and the green habutae and the gold velvet for the two gowns will not really look great covered in what looks like little hairy spider legs. Not to mention it will be a pain to get it off.
For now, I'm off to take a tiny nap, then when my daughter wakes up, a bit of cleaning, vacuuming, then I get to start ironing out the fabrics and laying out the pattern and cutting!
Photos and sketches to come soon....
For now, I'm off to take a tiny nap, then when my daughter wakes up, a bit of cleaning, vacuuming, then I get to start ironing out the fabrics and laying out the pattern and cutting!
Photos and sketches to come soon....
Sunday, 26 December 2010
Gown updates Muriel and Di
Just got in contact with Di, she loves the blush silk so I can use it! I'm so excited, I love that fabric, I'm going to get another metre of it just in case, and some very thin muslin as well for inside the bodice and for the mock-up. She wants sleeves like the ones in this portrait of Isabel de Valois above. I am using a modified Simplicity payttern 3782, and making the pattern that is shown in the red gown on the cover. I have no idea whatsever how to do the longer black part of the sleeves in the portrait as I can honestly not see them very well, so I will be looking at other extant portraits from the period and trying to come up with a similar design. I already have a pattern mockup to try with the sleeves, we'll see how it turns out...
Saturday, 25 December 2010
New Gown project DI 1
I have a second gown on order for a lady named Di. She also chose the Queen Mary gown, but wanted it in a fabric that looked like a lovely blush pink colour. Upon arrival, the fabric was a vibrant orange. Yes, not pink, orange. Nothing like the photo. In my entire conversation with the owner of the company, while I described the fabric as pink, pinkish red, and blush coloured, he never once mentioned that it was orange, not pink. He only said it was 'darker' than the photo. I had to return the photo at a loss of £4.70 for their shipping, which they won't refund, and at £7.20 for return shipping. I am not impressed. At ALL. The original photo is this
The colour is closer to this above, only a little more brown. I was definitely NOT happy. Anyways, after that fiasco, she opted for cotton velvet. I managed to find one that set me back about £65 but it is, to me, a pretty light gold/fawn colour, and is fairly thin pile, but soft, easily workable, and pretty. I also found a satin backed silk dupion mix fabric in a slightley darker version of the pink tones in the first fabric, and it is gorgeous! I also found some lovely braid trim in the same colour and some ivory braided trim, as she liked the colours of my white gown in the Mary gown listing on etsy. The gold velvet I found is a bit less yellow than the gold in my gown, but the ivory colour is the same. I still am awaiting confirmation from her to see if she would like to use the silk fabric in the blush pink, which I think would look awesome! But it's her gown, so we'll see!!
![]() |
| The trims, satin backed dupion, and the cotton velvet |
Random sketches for decorating with the braid trim. I will be using #3 from above for the bodice, with different sleeves....
New Gown projects! MURIEL 1
This is the first project diary post for a gown for a lady named Muriel. She had ordered my Queen Mary gown from etsy, http://www.etsy.com/listing/64035274/ooak-queen-mary-of-scots-elizabethan-era .
She wanted habutae silk, a false silk made in Japan that apparently looks like real silk. I am a little skeptical about those claims, but the fabric when it arrived turned out to be lovely! It is a lighter-tone olive green, slightly shiny, but not a lot so the gown will still look period, and it is going to be trimmed in gold (non-metallic) braid. I am lining the bodice with some soft khaki cotton muslin, and it will also be stiffened up with several layers of fabric as well and boned to keep her curves in place.
She only wants a little trim and a single skirt so the main challenge in this gown will be fitting it, not adding 'pretties'. More pics to come soon!
She wanted habutae silk, a false silk made in Japan that apparently looks like real silk. I am a little skeptical about those claims, but the fabric when it arrived turned out to be lovely! It is a lighter-tone olive green, slightly shiny, but not a lot so the gown will still look period, and it is going to be trimmed in gold (non-metallic) braid. I am lining the bodice with some soft khaki cotton muslin, and it will also be stiffened up with several layers of fabric as well and boned to keep her curves in place.
She only wants a little trim and a single skirt so the main challenge in this gown will be fitting it, not adding 'pretties'. More pics to come soon!
![]() |
| The center fabric is the colour I used |
Thursday, 9 December 2010
New projects, old year
With the year almost out, I have found not one, but two jobs, only one of which I will be keeping after the new year (I hope!) and luckily it is my favourite! I haven't had much time to do any projects because of them though, I am working 6-7 over-full days per week! Finally I have found a little time to set up my etsy shop and one of my gowns in particular has generated quite stir! the Queen Mary of Scots gown, which is a fairly simple one piece gown has had 4 detailed inquiries, one custom order request already made, and a second and possibly third one on the way! Two gowns are green, one is olive green with tan trim and the other is a light sage green with berry red lining and trim, and the final gown will be red or white so I will be filling my house with festively coloured swathes of fabric soon! I am waiting on a fabric sample to arrive so I can make sure that the fabric I'm getting is the correct colour, then I'm off on gown number one! There will be a few difficulties with this one, first being that I cannot measure the lady myself and have her in for fittings, secondly, I have to alter the pattern possible quite a bit, and third, she does not wear a corset and is on the more voluptuous side, and has chosen a very thin fabric for the gown, and I do NOT want it to sag and look unflattering so I will have to be very creative with extra lining, and some extra boning. Gown number 2 will be a heavier weight twill, and gown number 3, cotton, so the fabrics will be much easier to work with than gown number one, which is being made with false silk. It will be a learning curve for sure, but I'm going to do my damned best!!! I'm using French seams on all the gowns, the bodices will be lined, trim hand sewn, and luckily, the ladies seem mostly content to have me use a hidden zipper...so far...
Sunday, 24 October 2010
Random Recipes #1 & 2 Vegetarian Indian Style soup & Rosemary garlic loaf
I just threw this together (as I do with most of my meals) and I love it so much I'm writing it down! It makes a lovely fragrant, tangy and slightly spicy indian tasting soup. You could always add chicken, but the garbanzo beans add protein enough for a veggie meal. I sometimes add kidney beans as they are full of iron as well.
2 cups jasmine rice
3 cubes vegetable stock
6 cups water
4 tbsp basil
8 cardamom pods, crushed
Dash of mild madras curry powder
2 tsp garlic
1/2 chopped white onion
Dash of cayenne pepper
Salt to taste
1 tsp crushed chili pepper
4 tbsp lemon juice (or to taste)
Frozen peas/corn/cubed carrots
1 can garbanzo beans
Olive oil
Fry the onions in the oil until slightly brown, then add the cayenne and chili and cardamom. Add the water, and bring to a boil. Crush the stock cubes and sprinkle in. Taste. Add salt. Taste again. Add the rice and boil, stirring occassionally for 10 minutes so the rice doesn't stick on the bottom. Add the vegetables, basil, garbanzo beans and simmer for a few minutes more. Add lemon to taste and enjoy!
I made some homemade garlic rosemary wholegrain bread and dipped it in this soup, and it was fantastic. For that you'll need
3 cups whole wheat flour
dash of olive oil
4 tbsp dried rosemary
2 tsp garlic powder
4-8 tsp salt (a little more tends to taste better, but do take a nibble of your dough as you can't take the salt out!)
4 tbsp sugar (to feed the yeast)
1 packet of yeast
warm water
1 tsp baking powder (optional)
Mix all dry ingredients together then slowly pour in the water and oil while kneading until it makes a firm, but moldable and smooth lump of dough. Knead for 6-8 minutes, then place in a lightly oiled baking dish and let rise for 30-35 minutes. Bake in an oven at 350F or 180C for 20-30 minutes, or until crust is crisp and browned and a knife/fork/toothpick in the center comes out clean and dry. Let sit for a few minutes before serving with butter. Yummmmmmmm. For a little more fun, you can make a rosemary/garlic tea, and use that as the water as well, or use diced fresh garlic, or fresh rosemary sprigs. A little more salt also usually tastes better.
2 cups jasmine rice
3 cubes vegetable stock
6 cups water
4 tbsp basil
8 cardamom pods, crushed
Dash of mild madras curry powder
2 tsp garlic
1/2 chopped white onion
Dash of cayenne pepper
Salt to taste
1 tsp crushed chili pepper
4 tbsp lemon juice (or to taste)
Frozen peas/corn/cubed carrots
1 can garbanzo beans
Olive oil
Fry the onions in the oil until slightly brown, then add the cayenne and chili and cardamom. Add the water, and bring to a boil. Crush the stock cubes and sprinkle in. Taste. Add salt. Taste again. Add the rice and boil, stirring occassionally for 10 minutes so the rice doesn't stick on the bottom. Add the vegetables, basil, garbanzo beans and simmer for a few minutes more. Add lemon to taste and enjoy!
I made some homemade garlic rosemary wholegrain bread and dipped it in this soup, and it was fantastic. For that you'll need
3 cups whole wheat flour
dash of olive oil
4 tbsp dried rosemary
2 tsp garlic powder
4-8 tsp salt (a little more tends to taste better, but do take a nibble of your dough as you can't take the salt out!)
4 tbsp sugar (to feed the yeast)
1 packet of yeast
warm water
1 tsp baking powder (optional)
Mix all dry ingredients together then slowly pour in the water and oil while kneading until it makes a firm, but moldable and smooth lump of dough. Knead for 6-8 minutes, then place in a lightly oiled baking dish and let rise for 30-35 minutes. Bake in an oven at 350F or 180C for 20-30 minutes, or until crust is crisp and browned and a knife/fork/toothpick in the center comes out clean and dry. Let sit for a few minutes before serving with butter. Yummmmmmmm. For a little more fun, you can make a rosemary/garlic tea, and use that as the water as well, or use diced fresh garlic, or fresh rosemary sprigs. A little more salt also usually tastes better.
Subscribe to:
Posts (Atom)